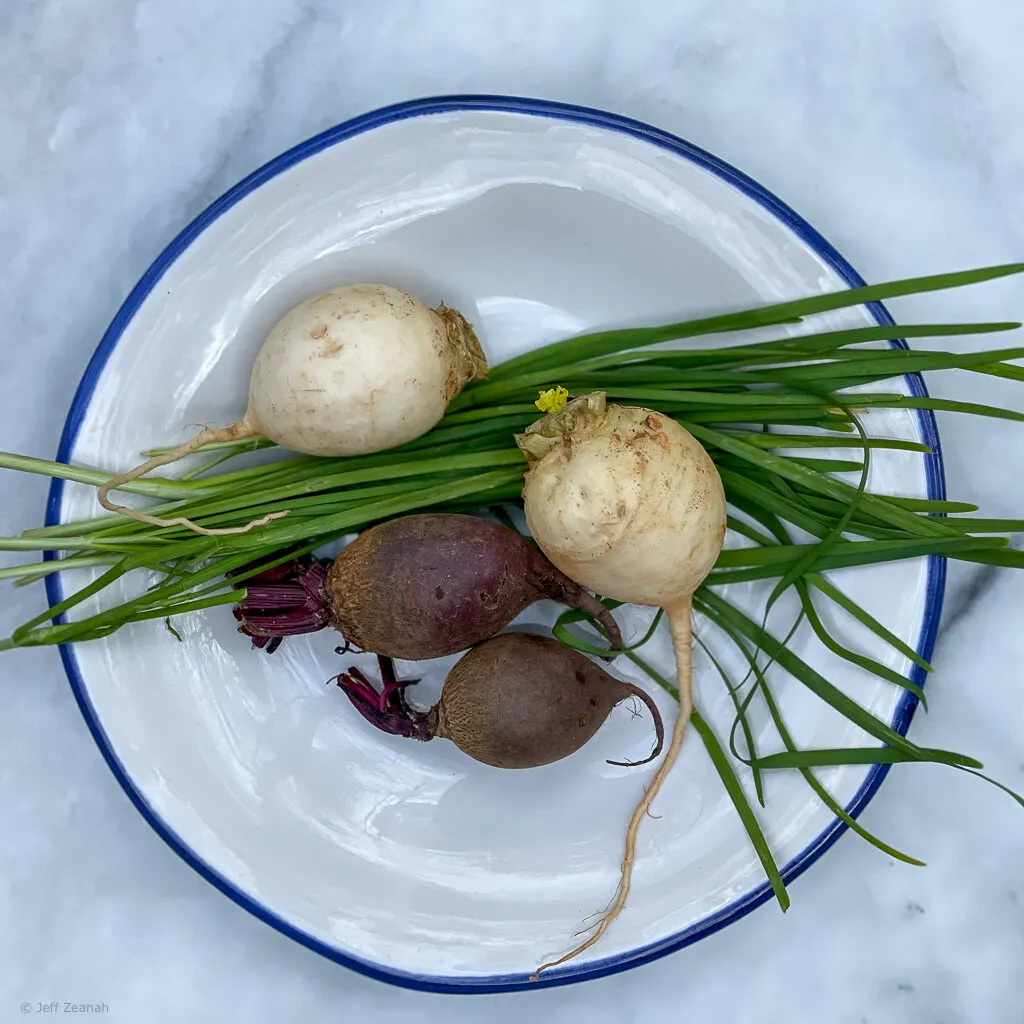
This turnip and beet gratin recipe was created out of a sense of vexation. Summer is ending, it is definitely Fall and I totally get the mix of fresh vegetables is going to be different at the market. But I do get a bit tired of turnips and beets. Even though the turnips are the milder Hakurei Turnips and the beets include both gold and red varieties and striped Chioggia Beets, I still get a bit tired of roasting them. I decided I needed a way to cook them together. However, envisioning the red beets bleeding color all over the turnips just seemed so unappetizing.

BTW, if you decide to do this in the spring you may likely have some good fresh beet greens. Don’t let them go to waste, they are wonderful sautéed.
Turnip and Beet Gratin — The Solution
I realized the taste that I was looking for could be achieved with a gratin, specifically a Parmesan gratin. Furthermore, I solved the color bleed problem in a satisfying way. I layered the beets below the turnips.
My solution is pretty flexible and will work with any combination of turnips and beets you have. Furthermore, you can adjust the quantities as needed for taste or availability.
Notes on Technique
The Gratin
For the gratin, I developed a basic white sauce. I used approximately a third cream and two-thirds milk. Also, all milk would work fine. I believe all cream, however, would be too heavy.


Layering
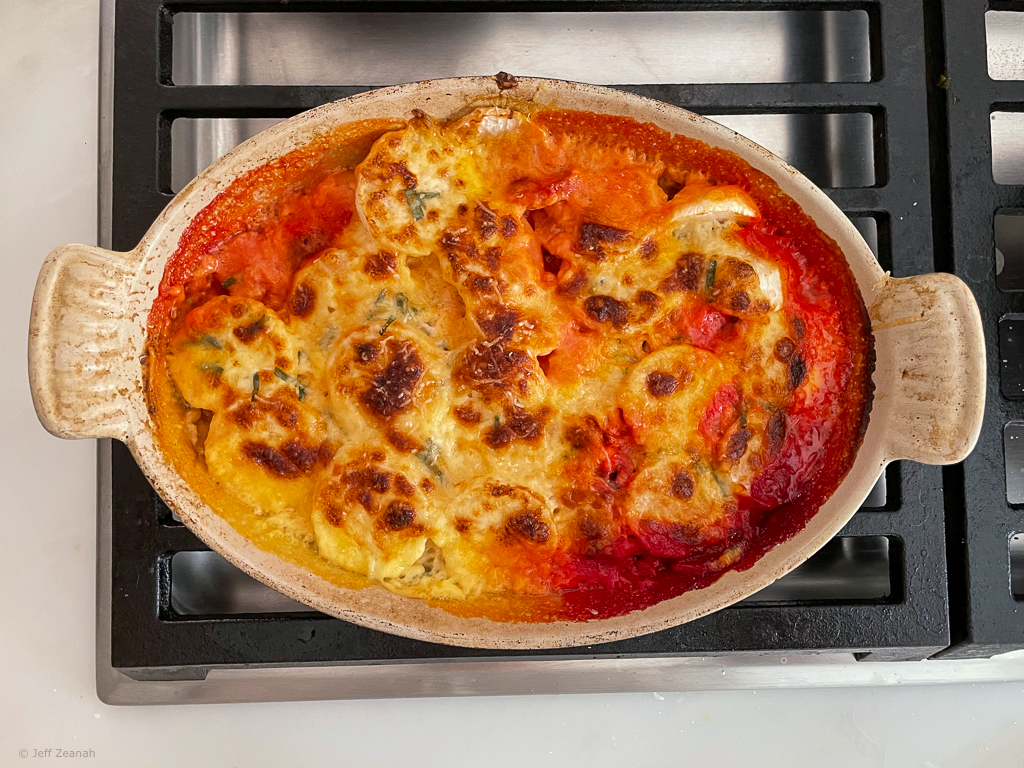
My solution to the color bleeding was to slice the beets and the turnips separately. I then layered the beets on the bottom, roughly two layers. I topped the beet layers with turnip layers. My thought was that the beet color would not run down into the dish unattractively. What happened was the beets actually bubbled up into the turnips. The result was flashy, and beautiful coming out of the oven. Success!
If you want to take this to the next level you can get creative with your placement of gold and red beets on the bottom and produce a pattern.
Notes on Ingredients
Beets
As discussed, I used a combination of gold and red varieties and striped Chioggia Beets that I had available. My thought is the combination was best. Frankly, I think red beets alone are a bit overwhelming. I really think the combination is preferable if available.
Turnips
Hakurei Turnips are smaller and milder than conventional turnips. They were excellent in this dish. If using conventional, stronger turnips, you might want to use more cream than the one-third to two-thirds ratio I used.

Chives and Parmesan
The final touches to this dish were using real Parmesan Reggiano grated on top and mixing fresh chives into the white sauce.
Related Posts


Turnip and Beet Gratin
Ingredients
- 4-5 small turnips
- 4-5 beets
- "Generous" Tablespoon Butter
- Heaping Tablespoon of Flour
- ⅓ cup cream
- ⅔ milk
- 10 or so blades of fresh chives
- Grated Parmesan, sufficient enough to cover the top of the gratin dish.
Instructions
All measurements in this recipe are approximate. What is important is to have the right amount of vegetables to fill your gratin dish, and the right amount of sauce to come just to the top of the vegetables. The only real concern in measuring is the butter and flour should be about the same amount. Additionally, use about 1 tablespoon of each to a cup of liquid.
- Pre-heat oven to 400°F (200°C).
- Peel and slice the beets and turnips. Place in individual bowls and salt well.
- Layer the beets on the bottom of a gratin dish. One or two layers as needed. Layer the turnips on top. Again, one or two layers as needed. The top of the layers should be just below the top of the gratin dish.
- Melt the butter in a small-medium saucepan over low heat. When melted add the flour and mix and cook the flour in the butter. This is the roux. The flour will now not taste "raw" and will be ready to absorb the liquid.
- Begin to add the cream and the milk a little at a time, alternating as you go. Stir to absorb the liquid into the roux making sure it thickens before adding more liquid.
- Continue to add cream and milk as needed to have a thin sauce. Judge the volume to determine that the sauce is ample enough to fill the gratin dish so that the sauce is even with the layers of vegetables. Add more milk and cream if needed.
- Add the chives to the sauce and stir in well.
- Pour the sauce over the vegetables and top with the Parmesan.
- Place in oven and bake for 25-30 minutes until crisp and brown on the top. The sauce should be bubbling a bit when you remove it.